//2023-03-22(금) AWS SSM (Session System Manager) 관련 문건 업데이트
// AWS CLI UPDATE :
AWS Session Manager Plugin for the AWS CLI
https://docs.aws.amazon.com/systems-manager/latest/userguide/session-manager-working-with-install-plugin.html
// AWS SSM Command (Session Manager) :
aws ssm describe-instance-information
=> Table Data provided for executive summary
aws ssm start-session --target i-000000000000
=> Directly connection via aws ssm
* 여기서 부터는 잘 쓰는 코맨드는 아님
aws ssm list-documents
=> List of all documents for describing "platformtypes" and "document format"
aws ssm get-command-invocation
=> Need special additional parameter
aws ssm list-commands
=> No specific result
aws ssm send-command
=> No specific result
//SCP 및 SSH를 AWS SSM 으로 변경하기 위함 설정 작업
문서 : https://globaldatanet.com/tech-blog/ssh-and-scp-with-aws-ssm
Update local host SSH config
Download AWS SSM SSH ProxyCommand :
https://github.com/qoomon/aws-ssm-ec2-proxy-command
Move this script to ~/.ssh/aws-ssm-ec2-proxy-command.sh
Make it executable chmod +x ~/.ssh/aws-ssm-ec2-proxy-command.sh
Add following entry to your ~/.ssh/config
host i-* mi-*
IdentityFile ~/.ssh/id_rsa
ProxyCommand ~/.ssh/aws-ssm-ec2-proxy-command.sh %h %r %p ~/.ssh/id_rsa.pub
StrictHostKeyChecking no
Execution Manual :
SSH can be performed as normal using the instance-id as the hostname.
Most SSH command line switches can be used such as using a key in the following example:
export AWS_PROFILE='default'
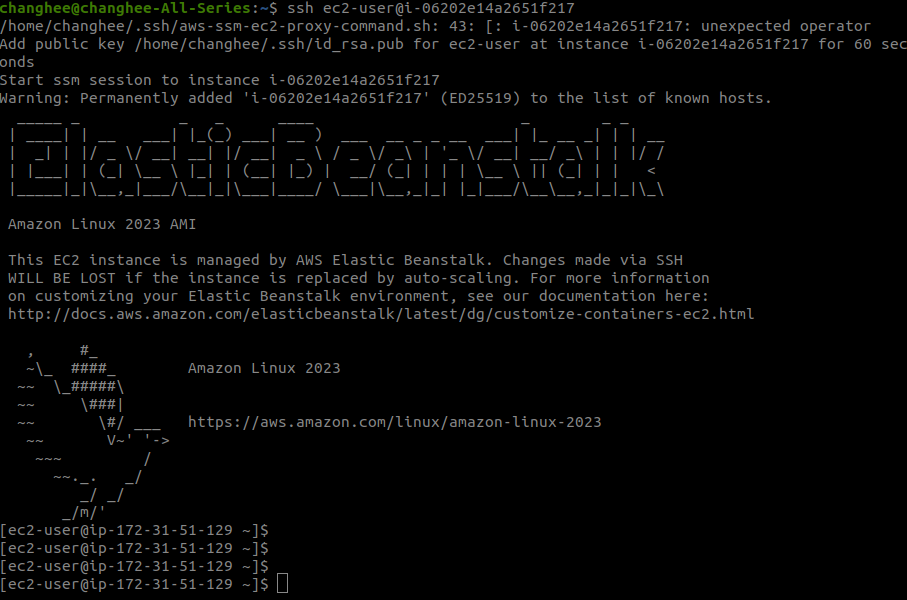
ssh ec2-user@i-08c24d1134323b334
=> Succeed.
scp /home/changhee/myfile.txt ec2-user@i-08c24d1134323b334:/var/www/html
=> Succeed.
//Key Pair Issue 재정리
1) *.pem 생성 (private):
로컬에서 생성한 private key 또는 amazon에서 생성한 후 Download 도 가능.
Amazon : EC2 : Network & Security : Key Pairs : Create Key Pairs
=> Generate private file and download file (myName.pem or id_rsa)
2) *.pub 생성 (서버와 공유, public) :
private key (*.pem) 을 바탕으로 서버와 공유를 하기 위해 생성한 키
=>일반적으로, keygen을 통해서 변환 생성됨.
=> private key 에서 public key를 만드는 방법
ssh-keygen -y -f private_key.pem > public_key.pub
AWS 에서 생성해서 다운 받는 경우는 생성한 id_rsa.pub 키는 .ssh에 보관만 잘하면 됨.
각 인스턴스에 어떤 키를 사용해서 생성되었는지는 표기되어 있음.
3) 하기와 같이 로컬에서 keygen을 통해서 한번에 *.pem / *.pub 파일을 생성하는 경우도 있음.
Generate SSH Key Pair :
ssh-keygen -t rsa -b 2048 -C "myID@email.com"
=> Generating public / private rsa key pair
=> Default file name
private key : id_rsa (id_rsa.pem)
public key : ids_rsa.pub
=> 금회, 신규로 Amazon : EC2 : Network & Security : Key Pairs : Create Key Pairs 에서 생성한
=> id_rsa(*.pem, private) 파일을 가지고, 공유키를 생성하여 (ssh-keygen -y -f id_rsa > id_rsa.pub)
=> EC2 생성한 것과 통신한 결과 SSH / SCP 등의 커맨드가 모두 올바르게 동작한 것을 확인함.
=> 로컬 PC 내 .ssh 파일 구조는 하기와 같음.
=> 상기 두 개의 파일은 aws ssm proxy command를 사용하기 위해서 추가를 해주어야 함.
-rwxrwxr-x 1 changhee changhee 2547 3월 23 06:04 aws-ssm-ec2-proxy-command.sh
-rwxrwxr-x 1 changhee changhee 145 3월 23 06:05 config
-rw------- 1 changhee changhee 1831 3월 22 20:59 id_rsa
-rw-rw-r-- 1 changhee changhee 404 3월 22 21:18 id_rsa.pub
-rw------- 1 changhee changhee 648 3월 23 06:13 known_hosts
-rw-r--r-- 1 changhee changhee 426 3월 23 06:06 known_hosts.old
//Sample Results :
1) get instances information
aws ssm describe-instance-information
{
"InstanceInformationList": [
{
"InstanceId": "i-000000000000000",
"PingStatus": "Online",
"LastPingDateTime": "2024-03-22T09:49:18.287000+09:00",
"AgentVersion": "3.3.131.0",
"IsLatestVersion": true,
"PlatformType": "Linux",
"PlatformName": "Amazon Linux",
"PlatformVersion": "2",
"ResourceType": "EC2Instance",
"IPAddress": "000.000.000.000",
"ComputerName": "ip-000-000-000-000-ap-northeast-2.compute.internal",
"AssociationStatus": "Success",
"LastAssociationExecutionDate": "2024-03-22T09:22:27.490000+09:00",
"LastSuccessfulAssociationExecutionDate": "2024-03-22T09:22:27.490000+09:00",
"AssociationOverview": {
"DetailedStatus": "Success",
"InstanceAssociationStatusAggregatedCount": {
"Success": 4
}
},
"SourceId": "i-000000000000000",
"SourceType": "AWS::EC2::Instance"
}
]
}
2) session start with target instance
aws ssm start-session --target i-000000000000
Starting session with SessionId: root-000000000000
sh-4.2$
3) SSH 인스턴스 연결 실행
ssh ec2-user@i-000000000000 (instanceID)
4) SCP 서버간 파일 Copy 실행
scp /path/to/source-file ec2-user@i-000000000000:/path/to/destination-folder
//ssh ec2-user@i-000000000000 결과
//scp /path/to/source-file ec2-user@i-000000000000:/path/to/destination-folder

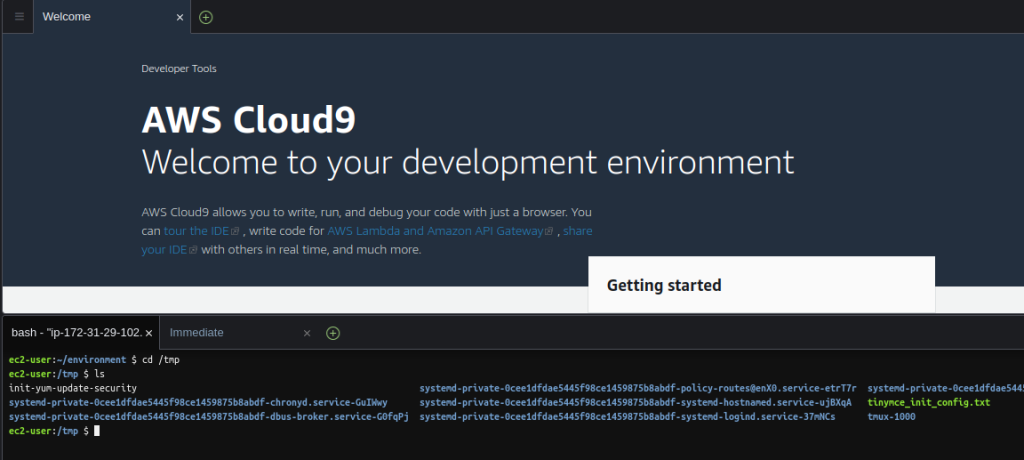
//Cloud 9 내 정상적으로 복사 됬는지 확인
– 클라우드9는 퍼블릭키 사용으로 PC내 프라이빗키 사용하지 않음
– *.pem 키 사용하는 것과 동일하게 세팅을 했을 때 Known_host에 키 추가 되고 정상 작동함.